

How to Travel with Your Mountain Bike in Australia: Flights, Road Trips, and Trail Destinations Worth the Drive
There is a moment every mountain biker knows. You have just landed at a new trail network — Rotorua, Derby, Queenstown, Cairns — and the bike comes out of the bag in one piece, bolts back together cleanly, and the first descent is everything the trail maps promised. Getting to that moment without drama is the whole game.
Travelling with a mountain bike in Australia takes a bit of planning. The flights are long, the road trips are longer, the trails are worth every kilometre, and your bike will cop some punishment in transit whether you like it or not. This guide covers everything: flying with your bike, road-tripping it, the trail destinations worth building a trip around, and how to make sure your cockpit is in the best shape before you leave home.
Flying with Your Mountain Bike: What Actually Works
The Three Packing Options
There are three realistic options for flying with an MTB, each with genuine trade-offs.
1. Cardboard Bike Box
Free from any bike shop and the most common choice for one-way or infrequent trips. Pros: cheap, disposable at the destination (useful if you are buying a one-way ticket and riding home). Cons: no padding, no protection if mishandled, and you need a bike shop at the destination to sort out return packing. Best for: first-timers on a budget, trips where you have a mate at the other end with tools and tape.
2. Soft Bike Bag (EVOC, Biknd, etc.)
The sweet spot for most travelling riders. Padded, manageable to carry, compresses down reasonably well when empty. EVOC bags in particular have a good reputation among the Aussie trail-trip crowd. The rear triangle needs extra padding — use your kit, helmets, or foam pipe lagging around the chainstays. Pros: significantly better protection than cardboard, reusable, fits in most overhead storage areas of shuttle vans. Cons: not cheap (A$400–A$800+), still subject to airline handling, and some full-suspension bikes are a tight fit.
3. Hardshell Case
The gold standard for protection, and the right call if you travel four or more times a year. Cases from Thule, EVOC, and B&W are bomb-proof and protect against the worst baggage handler days. Cons: heavy, expensive, and airport storage at the destination needs planning. Best for: regular travellers, carbon frame owners, anyone who has seen what happens to a bike box in a busy terminal.
Dismantling Your Bike for the Bag
Regardless of which bag you use, the disassembly process is the same:
- Remove the pedals — left-hand thread on the left, right-hand thread on the right. A flat pedal spanner makes this faster. Worth noting: alloy flat pedals with a standard 9/16” thread swap out in under two minutes and save considerable space in the bag.
- Drop the handlebar — loosen the stem bolts and rotate the bar down to sit alongside the frame. This is where bar width starts to matter. A 720mm or 780mm alloy handlebar is already at the wide end for trail riding; if your bag is tight, a 720mm bar sits more cleanly than an 800mm+ unit. Some riders cut their bars to bag width specifically for travel.
- Remove the stem (if needed) — if you have a longer stem creating packing awkwardness, pulling it off the steerer takes two minutes. An ultralight CNC stem like the Lunje 31.8mm uses standard 4-bolt faceplate, so reassembly at the destination is straightforward with a 4mm hex key.
- Lower the seatpost — drop it as far as it goes and tighten the collar. If you have a dropper, leave it in the lowest position.
- Remove the wheels — through-axles out, rotors protected with rotor covers or cardboard sleeves (brake rotor tabs are the most commonly bent part in transit).
- Deflate tyres to around 15–20 PSI — not completely flat, but reduced enough to account for pressure changes in the hold. If you are tubeless, partial deflation also reduces the risk of a burp popping the tyre off the rim.
- Protect the derailleur — a derailleur hanger guard or a thick layer of foam around the mech is not optional. It is the most vulnerable part in any packing scenario.
- Wrap fork stanchions — foam pipe lagging or bubble wrap around the lowers. Scratched stanchions are a bad start to a riding holiday.
Airline Fees: What to Expect in Australia
Bike fees vary considerably between carriers and change regularly, so always check directly before booking:
- Qantas / Jetstar: Bikes typically count as oversize sporting equipment. Budget A$50–A$80 each way domestically. Book in advance online as airport counters often charge more.
- Virgin Australia: Similar pricing to Qantas. Pre-booking is cheaper than airport payment.
- Rex: Smaller aircraft mean stricter weight limits. Check on a per-route basis — some Rex routes are a no-go for full-suspension bikes in a hardshell case.
A full-suspension bike in a softbag typically lands at 14–18kg. A hardshell with a big trail bike inside can push 22–25kg. Factor that into your luggage allowance maths before you get to the check-in counter.
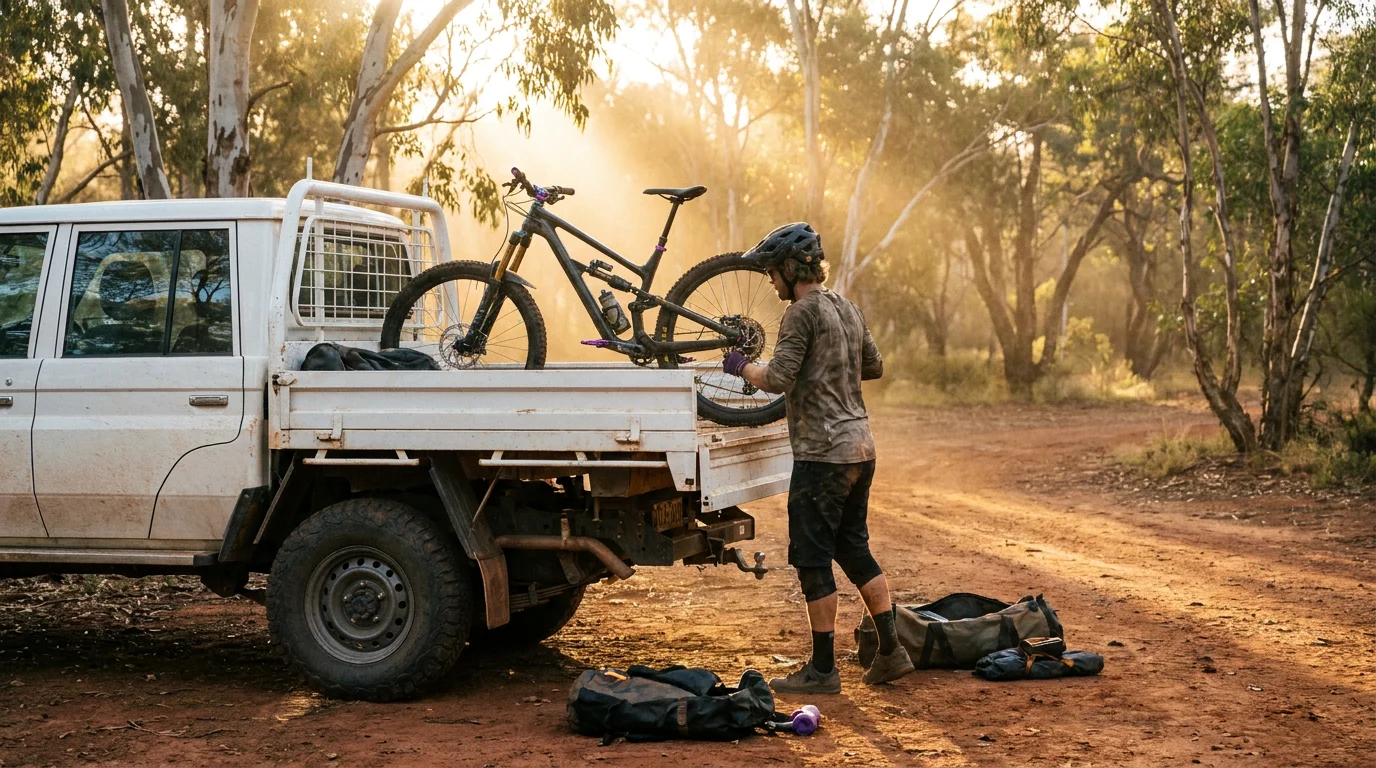
Road Tripping with Your Bike: The Better Option for Most Australians
Honestly, for most of the best MTB destinations in Australia, driving is the better call. No bike fees, no disassembly stress, more kit capacity, and the flexibility to hit trails you read about on the way through.
Ute Tray
The most common Aussie MTB transport solution. A full-suspension bike fits comfortably in a standard ute tray. Use a basic fork-mount or a wheel-bucket system bolted to the tray, and strap the bike at the frame. Cover with a tarp on highways to keep the dust off the drivetrain. The 79 Series LandCruiser tray has become something of an unofficial standard in the Aussie trail-riding community for good reason — bikes go in the back, fuel range is massive, and it handles whatever road the trailhead demands.
Tow Ball Bike Rack
For those without a ute, a tow ball platform rack carries two to four bikes securely and keeps them accessible at stops. Quality matters here — cheap racks flex at highway speed and put lateral stress on your dropouts. Thule, Yakima, and Saris are the brands worth spending up on.
Roof Rack
Works well until you forget the bike is up there and pull into a low carpark. It happens more than people admit. Fork-mount systems on roof bars are solid for highway driving, but add significant height to the vehicle and kill fuel economy at speed.
Pre-Trip Bike Check
Before any trip — flight or road — run through this checklist:
- Brake pads: Check thickness. If you are heading to somewhere like Derby or Queenstown with long, steep descents and you are already down to 1.5mm of compound, you will be replacing pads on the road. Carrying a spare set of Shimano-compatible disc brake pads weighs nothing and costs little. The Bucklos Kevlar-reinforced pads in particular bed in quickly and run quietly — useful when you are riding unfamiliar trails and want to hear what is coming.
- Grips: Worn lock-on grips lose their feel on rough terrain and can spin on the bar under hard braking. If yours have done a season, swap them before the trip. Lock-on grips take five minutes to swap and make a noticeable difference to hand fatigue over a full day.
- Stem bolts: Torque to spec with a proper torque wrench. This is the one thing that gets missed most often. A stem that loosens on a descent is a bad day on a trail you have never ridden before.
- Tyre pressure and tubeless sealant: Top up sealant if it has been more than two months. Check your target pressure for the terrain you are heading to — it will likely be different from your home trails.
- Derailleur hanger: Pack a spare. They are cheap, light, and trail-specific. Finding out yours is bent on day one in Derby is the kind of experience that radically improves your packing habits.
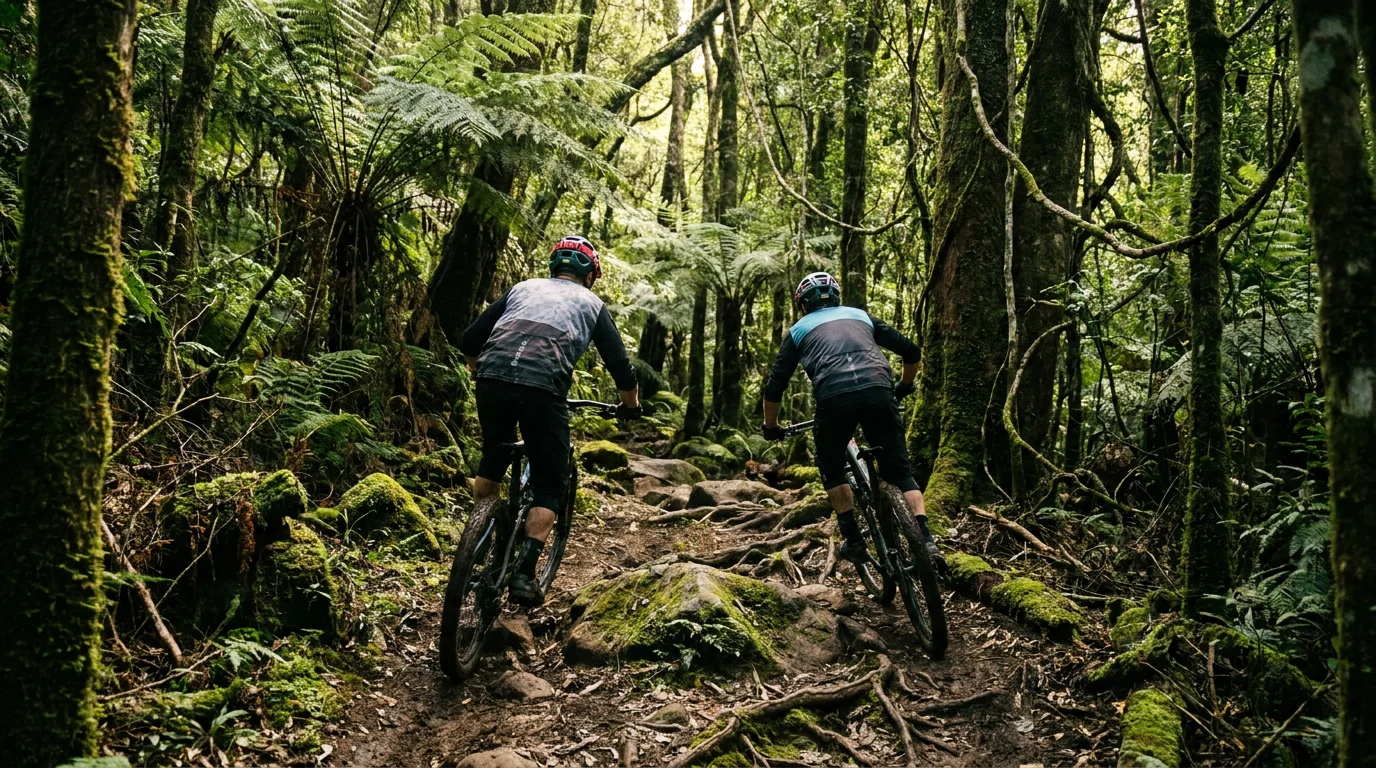
Australian MTB Trail Destinations Worth Building a Trip Around
Derby, Tasmania
The benchmark for Australian mountain biking infrastructure. Blue Derby has over 125km of trail spread across multiple grades, purpose-built to world-class standard. The Flickity trail system above the town is among the best flow trail riding anywhere in the country. Derby township has grown entirely around the MTB industry — accommodation, bike hire, shuttle services, and trail-side cafes are all there. Flying into Launceston and driving is the most straightforward approach. Allow at least four days to do the trail network justice.
Cairns, Queensland
Gravity capital of Australia. Smithfield Mountain Bike Park is already an elite DH venue — and as reported recently on Trail Talk, a major expansion is underway that will nearly triple the trail network in size. The combination of tropical rainforest terrain, purpose-built jump lines, and competitive-level downhill tracks makes Cairns a legitimate world-class destination. The heat and humidity are real — early morning starts are non-negotiable in summer. Fly direct to Cairns from most major Australian cities.
Thredbo, New South Wales
Thredbo Alpine Bike Park operates over the ski resort infrastructure in summer, which means gondola uplift to a 1,930m summit and gravity runs back to the valley. The descents are long, varied, and exposed to mountain weather that changes fast. Drive from Sydney in around four hours or Canberra in two. The Alpine Way is a genuinely good road trip in either direction.
Bright, Victoria
The Rail Trail network in the Ovens Valley is popular for cross-country riders, but the better-kept secret is the MTB trail development in the hills above Bright and across to Mystic. Victorian alpine terrain, manageable access roads, and a town that caters well to cyclists. Drive from Melbourne via the Hume Highway and Great Alpine Road — allow three hours.
Rotorua, New Zealand
Technically not Australia, but if you are flying and packing the bike, Rotorua is worth mentioning. Whakarewarewa Forest (“The Redwoods”) is one of the most refined MTB trail networks on the planet. New Zealand domestic air connections from most Australian cities are competitive on price, and Rotorua’s trail town infrastructure rivals anywhere in the world. Build in at least five days.
What to Pack Beyond the Bike
The tools and spares list for a riding trip is longer than most people expect until they get caught out:
- Multi-tool with chain breaker
- Spare derailleur hanger (bike-specific)
- Tubeless plugs and CO2 or a hand pump
- Spare brake pads
- Spare rear mech (if the destination has gnarly rock gardens)
- Bleed kit if you have hydraulic brakes and are going somewhere remote
- Torque wrench or torque key — stem and handlebar bolts, seatpost collar
- Chain lube (wet for Cairns and Derby, dry for dusty inland trails)
Dialling Your Cockpit Before You Leave
A trail trip is not the time to be experimenting with cockpit setup. Get it right at home before you pack the bike.
Bar width is personal, but 760–780mm covers most Australian trail riders well — wide enough for stability on rough terrain without catching trees on tight singletrack. The WAKE alloy handlebar comes in 720mm and 780mm, both at 31.8mm clamp diameter. Alloy over carbon for a travel bike is a reasonable call — alloy can take a knock in the bag without cracking invisibly.
Stem length determines how stretched out or stacked you ride. Most modern trail geometry runs well with a 35–50mm stem. Shorter stems increase front-end responsiveness on technical terrain. The Lunje CNC ultralight stems come in at 125g — light enough that swapping stem length costs almost nothing in weight. The oil slick finish holds up well to the kind of minor scratches a travel bike inevitably picks up.
Grips are the one contact point that degrade fastest and get replaced least often. Lock-on grips with double clamps are the standard — they do not move on the bar and they come off cleanly for packing. If yours have done two seasons, they owe you nothing. Replace them before the trip.
The Bottom Line
The logistics of travelling with a mountain bike are manageable once you have done it a couple of times. The first trip will take longer to pack, cost more in fees than expected, and involve at least one moment of bike-box-related panic at the check-in counter. By the third trip, you will have a system.
More importantly: the trails are worth it. Derby, Cairns, Thredbo, Bright — these are places that remind you why you ride. Getting there with a bike that is properly set up and in one piece is the whole job.
Browse the full range of MTB cockpit parts at Chunky Monke — handlebars, stems, grips, pedals, and brake pads, all at prices that do not take the p!ss.


